VestaCP is a popular web hosting control panel with an intuitive interface that simplifies server management. Installing an SSL certificate on VestaCP is necessary to protect your website’s data from interception by hackers and mitigating “Not Secure” warnings.
In this guide, learn how to install an SSL Certificate on VestaCP for data security. With its user-friendly control panel interface, VestaCP makes this process easy. We will walk through the complete process of securing your website with SSL certificates.
So, let’s start.
Process of CSR Generation for VestaCP
-
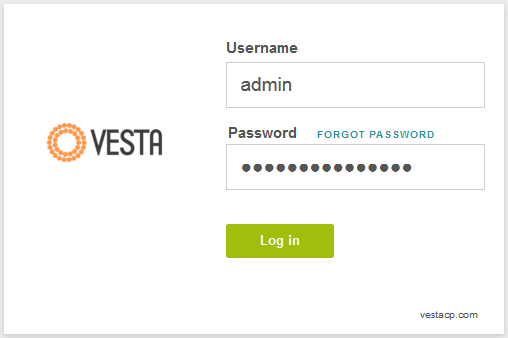
To generate a CSR, first go to VestaCP and log in:
-
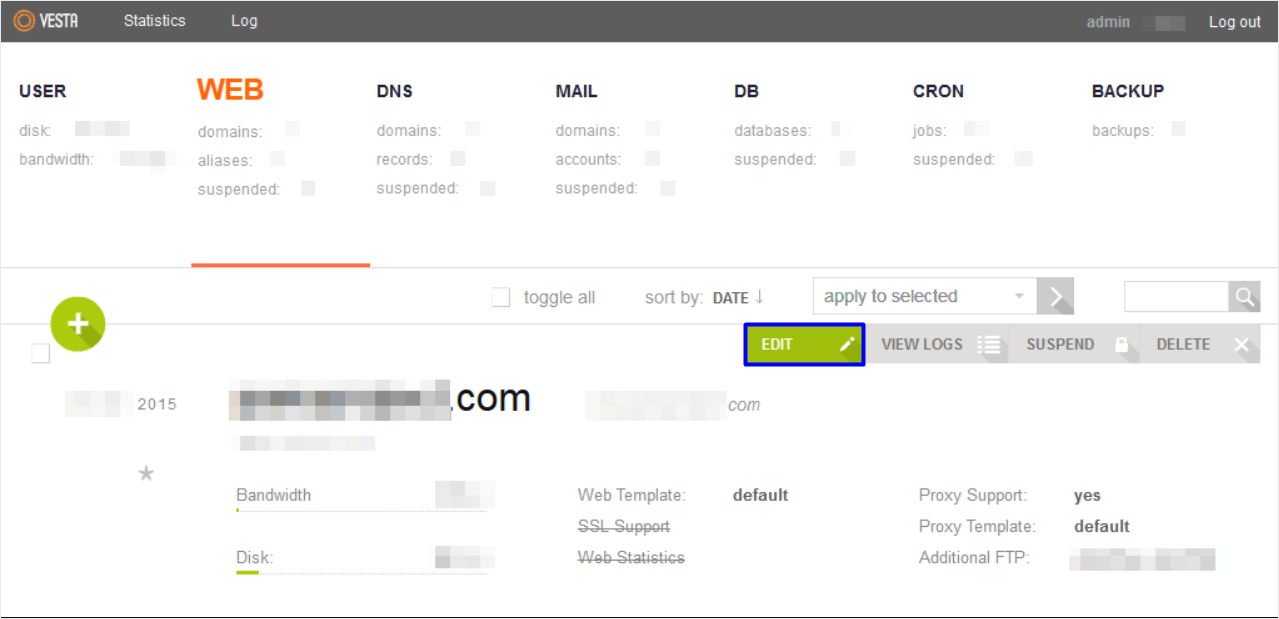
Click on the WEB option → Pick the domain for which you wish to generate a Certificate Signing Request (CSR) and then click EDIT.
-
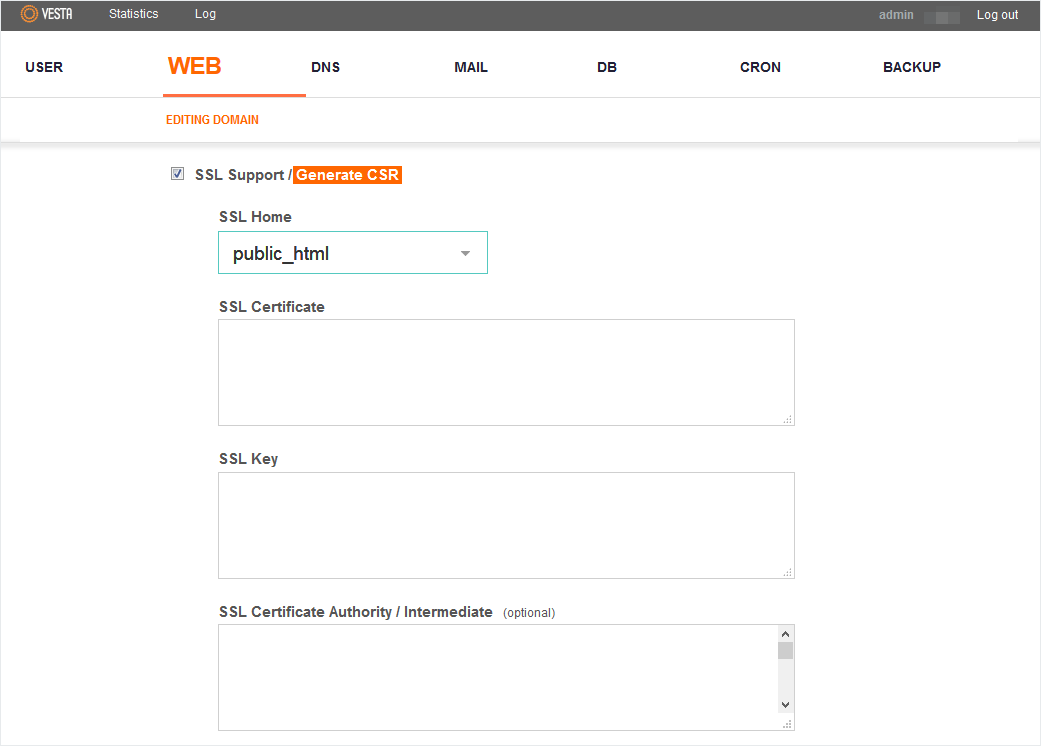
Now find the SSL Support tab on the next page → Click on Generate CSR.
-
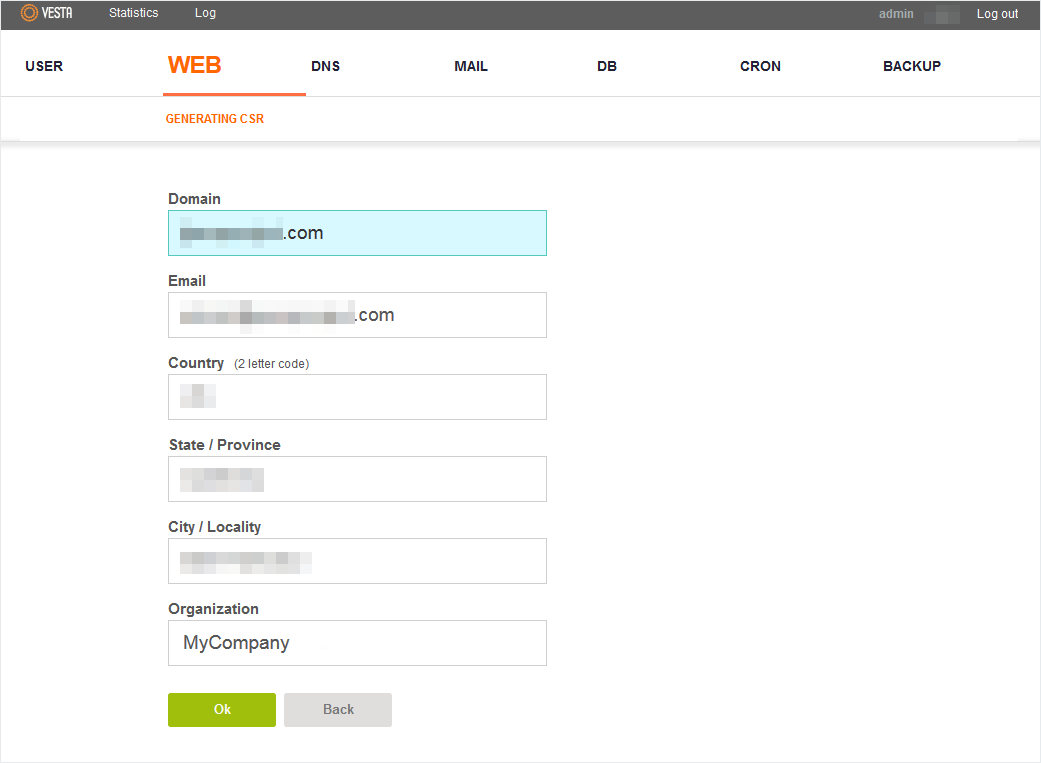
On the Generate CSR screen, enter all the requisite information correctly:
- Domain: Enter your Fully Qualified Domain Name (e.g., “*.example.com” for wildcard certificates)
- Email: Add a valid email address
- Country: Two-letter country code where the domain is registered
- State/Province: Your state or provincial location
- City/Locality: Your city or local area
- Organization:
- For DV certificates: Can use “NA” (not publicly displayed)
- For OV/EV certificates: Must match the legal company name
Note: For OV and EV certificates, all location and organization details must match your registered company information. Use only alphanumeric characters in the CSR.
-
Click Ok to proceed.
-
After generating the Certificate Signing Request (CSR), you’ll have three components:
- the CSR,
- a temporary self-signed SSL certificate,
- and your Private Key.
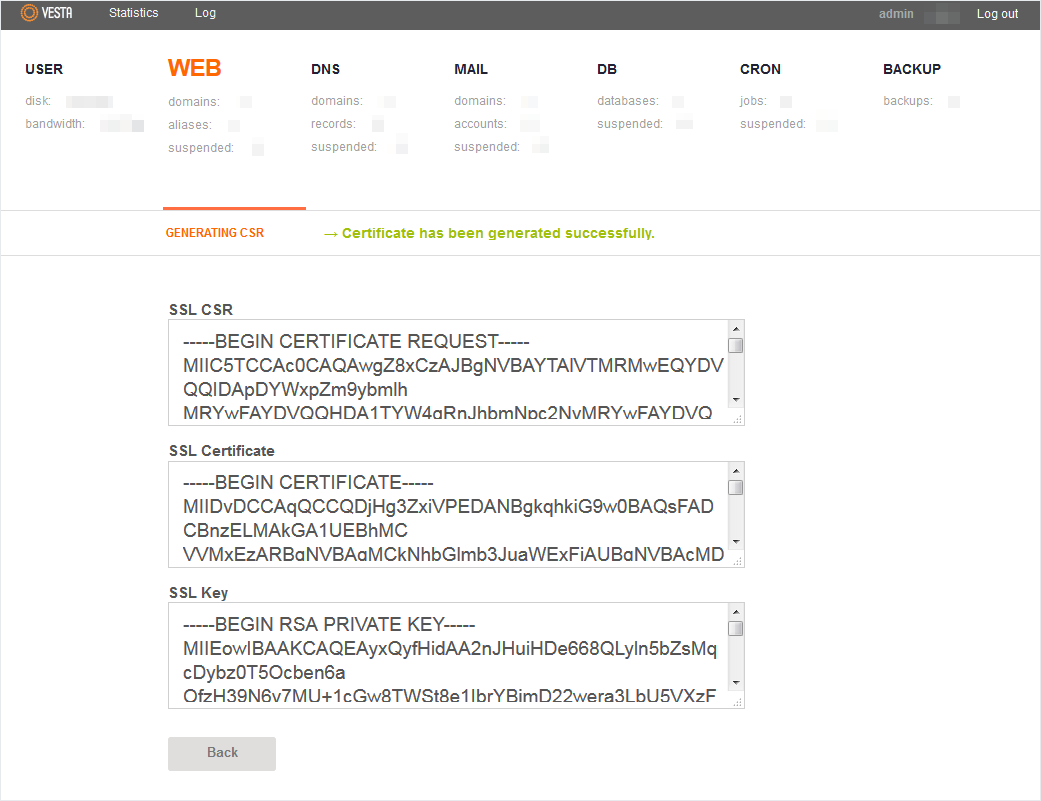
Since you’ll be obtaining a certificate from a trusted Certificate Authority, you can disregard the self-signed certificate. However, securely store your Private Key file, either locally or on your server, as it’s essential for the SSL implementation.
Once the CSR is generated, you can install an SSL certificate on VestaCP. The detailed SSL installation process is described in the next section.
How to Install an SSL Certificate on VestaCP
Here’s a step-by-step breakdown of installing an SSL certificate in VestaCP:
Step 1: Prepare SSL Files
After receiving the SSL files from the certificate authority, download and extract them locally. Three essential files are needed to install an SSL certificate on VestaCP: the SSL certificate file in .crt format , private key file , and CA Bundle file. These files contain the encrypted security information needed to set up HTTPS connections. Website administrators should keep these files in an easily accessible folder.
Step 2: Access the VestaCP Dashboard
Use administrator credentials to log into the VestaCP control panel. You can access it by navigating to https://<your-server-ip>:8083, replacing <your-server-ip> with your actual server IP address or domain name. After that, Go to the WEB tab in the main dashboard interface.
The following step contains all of the website-related configuration options.
Step 3: Configure Domain Settings
Click the Edit button to access configuration options for the target domain. In the domain settings, locate the SSL Support checkbox and enable it. Be sure not to check the Let’s Encrypt Support box, to avoid certificate conflicts.
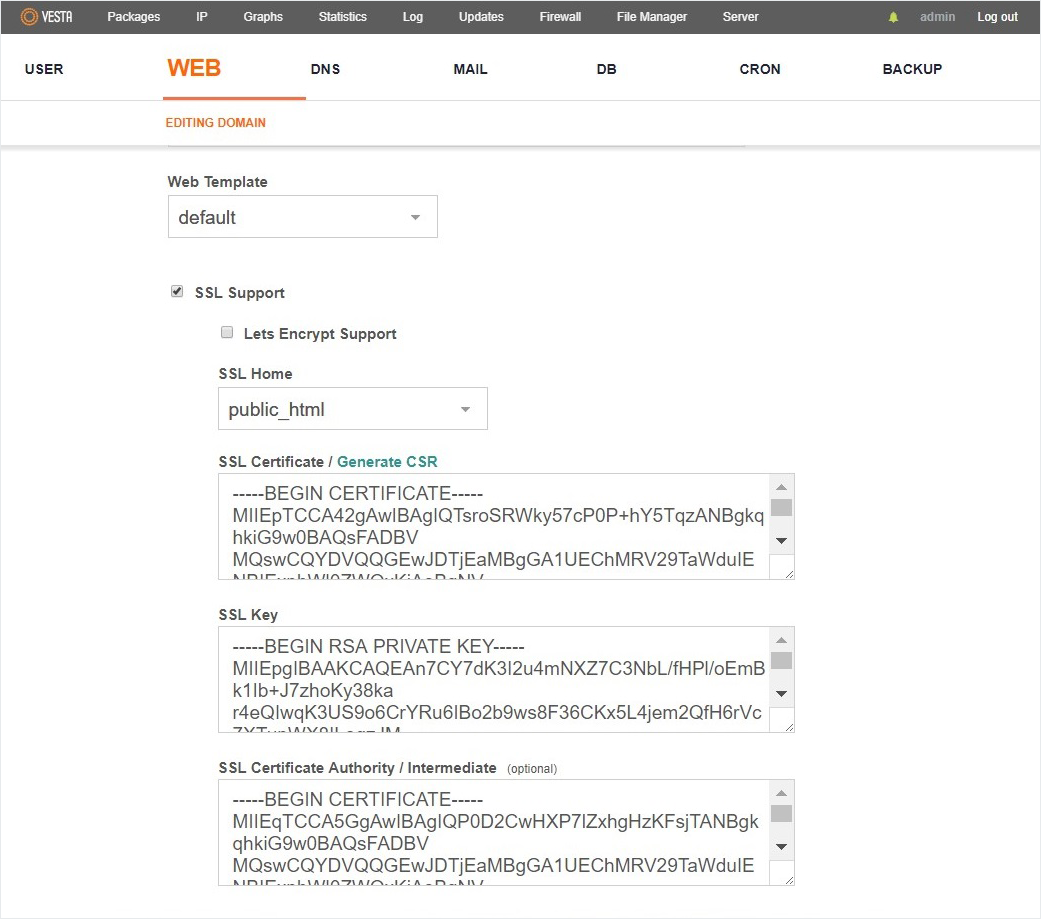
Enter the correct SSL files in the fields given below
- SSL Certificate: insert your main SSL certificate
- SSL Key: enter your private key
- SSL Certificate Authority/Intermediate: enter your CA Bundle
Step 4: Input Certificate Details
You have to go to the domain settings and find the SSL certificate input fields. Paste the entire content of the .crt certificate file into SSL Certificate field. This certificate contains the domain validation information. Be sure to include the —–BEGIN CERTIFICATE—– at the beginning and —–END CERTIFICATE—– at the end of the certificate content, and do not modify the formatting in any way.
Step 5: Add Key and Bundle
Put the private key content into the SSL Key field without changing its format. Paste the CA Bundle information into the SSL Certificate Authority field next. Each element plays an important role in creating a secure connection. Make sure that if you copied any content, they’re formatted properly.
Step 6: Complete Installation
After having checked the certificate information to be entered, proceed. Move to the end of the configuration page and click Save. The certificate installation will be processed automatically by VestaCP. Once the setup process is over, the system will show a success message.
Test your SSL Installation
Testing is crucial once you install an SSL Certificate on VestaCP to check if it’s correctly implemented or not. Online SSL checker tools instantly report certificate issues or problems with configuration. These tools verify that a certificate is valid, has good encryption strength, and is compatible with the browser. SSL setup on a website is something that should be tested regularly by website owners for optimal security standards.
Where to Buy the Best SSL Certificate for VestaCP?
If you need reliable SSL certificates for VestaCP, we’ve got you covered. CheapSSLShop has industry-leading SSL solutions at competitive prices available on our website. We have multiple options for VestaCP installation, from basic domain validation SSL to premium extended validation SSL certificates.
We provide our dedicated support team to help you select the certificate and set it up. Our team will help you find a certificate that fulfills your website’s needs. Visit our certificate store and get started with secure HTTPS today. Try now!

